Step1:First, you already install Android SDK on you PC.
Step2:The difference between Android SDK and Android NDK, Android SDK is to create a pure JAVA code application, and Android NDK is to create a JAVA application with the native library. The native library is a dynamic library. JAVA call the library through the JNI interface.
Step3:The NDK content a cross compiler toolchain, must runs on the linux environment. The Cygwin create a linux-link environment on windows. This article shows How to install Cygwin on windows.
Step4:Download the NDK from the office web site.
android-ndk-r8-windows.zip
Step5:Unzipped the android-ndk-r8-windows.zip to the Cygwin root directory.
Step6:Append the path define code to the .bash_profile in the I:\cygwin\home\{US ER NAME}\.bash_profile.
PATH=/android-ndk-r8:${PATH}
NDK_ROOT=/android-ndk-r8
NDK_Sample=/android-ndk-r8/samples
export PATH NDK_ROOT NDK_Sample
Step7:Click the batch file I:\cygwin\Cygwin.bat, enter Cygwin shell.Change current Directory to the /android-ndk-r8/samples/hello-jni/, and run the ndk-build command. The library ibhello-jni.so will be created.

Step8:When the library shows up. That means the environment of your Android NDK is ok.
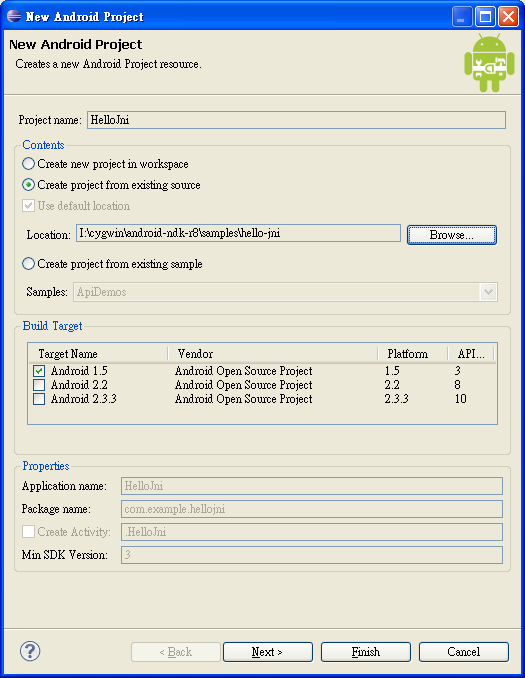
Step9:Let's start the real project of the Android. In the Eclipse we can open the exist project "hello-jni" from the NDK samples directory.
Step10:In the Package Explorer, we can find the libs directory include the library libhello-jni.so we create before.

Step11:Now we need setup some configuration to create a auto-build environment.
Enter project properties->Builders page, we create a new program builder.
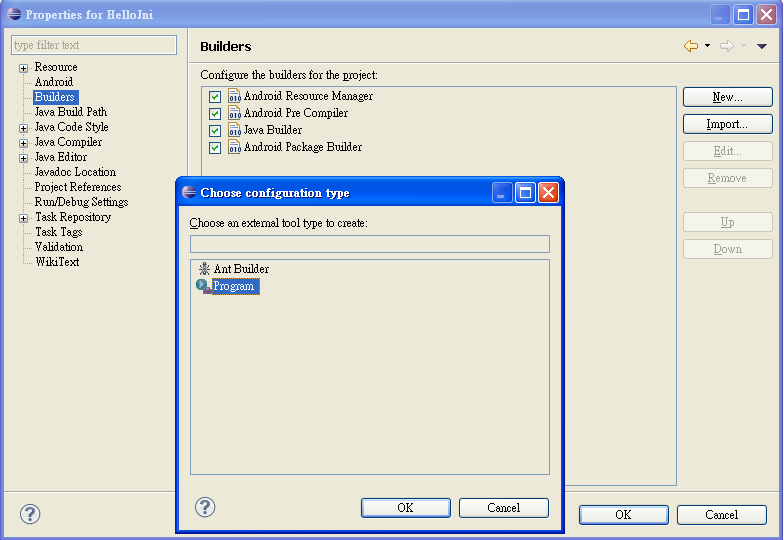
Step12:Click OK to the next window, fill the text with specific info.
Name: JNI_Builder
Locations:I:\cygwin\bin\bash.exe
Working Directory:I:\cygwin\bin
Arguments: --login -c "cd $NDK_Sample/hello-jni && ndk-build"

Step13:Switch to the Refersh page, checked Refresh resources upon completion and Specific resources.

Step14:In the pop-up window, we checked the libs directory. And click Finish back to the Edit Configuration window.

Step15:Switch to the Build Options page. Checked these options.
Allocate Console
Launch in background
After a "Clean"
During manual builds
During auto builds
Specify working set if relevant resources.

Step16:Click the Specific Resources, We checked the jni directory.

Step17:Click the finish button, and in the Builders page, it has a new program named "JNI_Builder".

Step18:Click OK button, back to the Eclipse main page.
Step19:Edit the hello-jni.c file, then save. The JNI-Builder will start to compile native library. And the native library will be packed into the Android APK.

excellent post.. works nice..
ReplyDeleteVery useful, thank you!
ReplyDeleteThat's very helpful!
ReplyDeletethank you very much from Russia!
ReplyDeletehi Everyone,
ReplyDeleteI am not able to proceed step7
could u please give more details about step7
thank you very much from Spain!
ReplyDelete