Pages

Showing posts with label Android. Show all posts

2014/05/07

How to secure connection between AWS SDK and mobile APP(Android, iOS)?

This article shows the steps to build the secure connection between AWS SDK and mobile APP(Android, iOS).

   Using the root key(access key ID, secret access key) in your mobile application in plain text is very dangerous.
AWS has a service for mobile client devices to connect to the AWS. The TVM(Token Vending Machine) creates a temporary credentials for mobile clients.
The IAM(Identity and Access Management) user is a limited grant permissions user for access AWS.
Here we will create a IAM user and build a TVM server for anonymous registration.

Step1:Fallow the steps to create a user to your AWS account for the TVM. Start from the paragraph "To add a user to your AWS account for the TVM" from this link. Token Vending Machine for Anonymous Registration - Sample Java Web Application.

Step2:Create a TVM server. Start from the paragraph "Create the AWS Elastic Beanstalk application" from this link. Token Vending Machine for Anonymous Registration - Sample Java Web Application.

Step3:Now you should have a IAM user and a TVM server runs on your AWS account. Download the AnonymousTVM sample for test. If you using Android download from this link aws-sdk-android-samples. This is for iOS aws-sdk-ios-samples. Fallow the README.md to run the project.


Step4:If you have a existed project using the root key, you can easily change to TVM. Copy the necessary files from the example to your project. These are iOS example files.
remove the Create Certificate codes.
        //Create Certificate
        mCertificate = [[AmazonCredentials alloc] initWithAccessKey:AccessKeyID withSecretKey:SecretAccessKey];
        
        //Initialize DynamoDBClient
        mDdbClient = [[AmazonDynamoDBClient alloc] initWithCredentials:mCertificate];

Change the access code.
From
DynamoDBPutItemResponse *response = [mDdbClient putItem:request];

To
DynamoDBPutItemResponse *response = [[AmazonClientManagerRunway ddb] putItem:request];

And That's it.

2012/08/08

How to use Android sensors?

This article teaches how to use Android sensors.

The Android sensors are hardware devices. Android provides a manager to control the devices.User should register the devices you want to use by the manager. And implements the callback functions for the sensor event alert.

Step1:We create a new class for the sensors. This is a reusable class.

public class SensorController implements SensorEventListener 
{
 public SensorController(Context context)
 {
 }
 @Override
 public void onAccuracyChanged(Sensor arg0, int arg1) 
 {
  // TODO Auto-generated method stub
 }
 @Override
 public void onSensorChanged(SensorEvent arg0) 
 {
  // TODO Auto-generated method stub
 }
}
Step2:The class implements two interface for the sensor events.In the class constructor we need the Context to get the sensor manager.
 private SensorManager mSensorManager = null;

 public SensorController(Context context)
 {
   mSensorManager = (SensorManager)context.getSystemService(context.SENSOR_SERVICE);
   registerSensor(); 
 }
Step3:Create the registerSensor() function to register the sensors.At this example i register the magnetic and accelerometer. These two sensor can combined to create a compass on Android.
 private Boolean sensorRegisteredFlag = false;
 private void registerSensor()
 {
  if(mSensorManager != null)
  {
   List sensors = mSensorManager.getSensorList(Sensor.TYPE_MAGNETIC_FIELD);
   if(sensors.size() > 0)
   {
    Sensor sensor = sensors.get(0);
    //if(!mSensorManager.registerListener(this, sensor, SensorManager.SENSOR_DELAY_NORMAL))
    if(!mSensorManager.registerListener(this, sensor, SensorManager.SENSOR_DELAY_GAME))//faster than SENSOR_DELAY_NORMAL
    {
     return;
    }
   }
   sensors = mSensorManager.getSensorList(Sensor.TYPE_ACCELEROMETER);
   if(sensors.size() > 0)
   {
    Sensor sensor = sensors.get(0);
    //if(!mSensorManager.registerListener(this, sensor, SensorManager.SENSOR_DELAY_NORMAL))
    if(!mSensorManager.registerListener(this, sensor, SensorManager.SENSOR_DELAY_GAME))//faster than SENSOR_DELAY_NORMAL
    {
     return;
    }
   }
   sensorRegisteredFlag = true;
  }
 }
Step4:The onAccuracyChanged() method is called when the sensor accuracy has changed. The first parameter is the sensor of the registered. And the other parameter is the new accuracy of the sensor.There are four value of the accuracy.At this example we does not care the changes.
SensorManager.SENSOR_STATUS_ACCURACY_HIGH 
    // This sensor is reporting data with maximum accuracy

SensorManager.SENSOR_STATUS_ACCURACY_MEDIUM 
    // This sensor is reporting data with an average level of accuracy, 
    // calibration with the environment may improve the readings

SensorManager.SENSOR_STATUS_ACCURACY_LOW 
    // This sensor is reporting data with low accuracy, 
    // calibration with the environment is needed

SensorManager.SENSOR_STATUS_UNRELIABLE 
    // The values returned by this sensor cannot be trusted, 
    // calibration is needed or the environment doesn't allow readings
Step5:The onSensorChanged() method is whole thing we want.We collect the magnetic and accelerometer values and convert to the human readable values.
 private final double RADIANS_TO_DEGREES = 180/Math.PI;
 private final float[] sZVector = { 0, 0, 1, 1 };
 private float R[] = new float[16];
 private float remapR[] = new float[16];
 private float remapR_inv[] = new float[16];
 private float AccelerometerValues_last[] = new float[3];
 private float MagneticFieldValues_last[] = new float[3];
 private float orientationValues[] = new float[3];
 private float orientationVector[] = new float[4];
 private float azimuthVector[] = new float[4];
 boolean bHaveAccelerometer = false;
 boolean bHaveMagneticField = false;
 private float orientation;//up direction
 private float azimuth;//aim to north
 private float pitch;

 public void onSensorChanged(SensorEvent event) 
 {
  if(event.sensor.getType() == Sensor.TYPE_MAGNETIC_FIELD)
  {
   MagneticFieldValues_last[0] = event.values[0];
   MagneticFieldValues_last[1] = event.values[1];
   MagneticFieldValues_last[2] = event.values[2];
   
   bHaveMagneticField = true;
  }
  if(event.sensor.getType() == Sensor.TYPE_ACCELEROMETER)
  {
   AccelerometerValues_last[0] = event.values[0];
   AccelerometerValues_last[1] = event.values[1];
   AccelerometerValues_last[2] = event.values[2];
   
   bHaveAccelerometer = true;
  }
  if(bHaveMagneticField && bHaveAccelerometer)
  {
   if(SensorManager.getRotationMatrix(R, null, AccelerometerValues_last, MagneticFieldValues_last))
  {
   SensorManager.remapCoordinateSystem(R, SensorManager.AXIS_Y, SensorManager.AXIS_MINUS_X, remapR);
   SensorManager.getOrientation(remapR, orientationValues);
    
   Matrix.multiplyMV(orientationVector, 0, remapR, 0, sZVector, 0);
   pitch = (float) (-Math.atan2(orientationVector[1], orientationVector[2]) * RADIANS_TO_DEGREES);
    
   Matrix.multiplyMV(orientationVector, 0, remapR, 0, sZVector, 0);
   orientation = (float) (-Math.atan2(orientationVector[0], orientationVector[1]) * RADIANS_TO_DEGREES);
    
   Matrix.invertM(remapR_inv, 0, remapR, 0);
   Matrix.multiplyMV(azimuthVector, 0, remapR_inv, 0, sZVector, 0);
   azimuth = (float) (180 + Math.atan2(azimuthVector[0], azimuthVector[1]) * RADIANS_TO_DEGREES);
   }
  }
 }
Step6:Three important values we want are ready. Provide get method for the other class.
 public boolean getNowOrientation(float [] retValues) 
 {
  retValues[0] = pitch;
  retValues[1] = orientation;
  retValues[2] = azimuth;
  return true;
 } 
Step7:Implement the on action methods.
 public void onResume()
 {
  registerSensor();
 }
 
 public void onPause()
 {
  if(mSensorManager != null && sensorRegisteredFlag)
  {
   mSensorManager.unregisterListener(this);
  }
 }
Step8:Back to the main activity class.Create a thread to get the values and refresh the values periodically.
public class MySensors extends Activity 
{
 private SensorController MySensors = null;
 private Handler mHandler = new Handler(Looper.getMainLooper());
 private TextView NowText = null;
 
 @Override
 public void onCreate(Bundle savedInstanceState) 
 {
  super.onCreate(savedInstanceState);
  setContentView(R.layout.main);
        
  MySensors = new SensorController(this);
        
  NowText = (TextView)findViewById(R.id.TextView01);
        
  mHandler.postDelayed(ReadSensorValues, 300);
 }
    
 private Runnable ReadSensorValues = new Runnable() 
 {
  float orientationValues[] = new float[3];
  public void run() 
  {
   MySensors.getNowOrientation(orientationValues);
         
   NowText.setText("pitch:" + orientationValues[0] + "\n" +
                   "orientation:" + orientationValues[1] + "\n" +
                   "azimuth:" + orientationValues[2]);
         
   mHandler.postDelayed(ReadSensorValues, 100);
  }        
 };
 protected void onResume()
 {
  super.onResume();
  MySensors.onResume();
 }   
   
 protected void onPause()
 {
  super.onPause();
  MySensors.onPause();
 }    
}
Step9:Run the application, you should see the values beat in the TextView.

2012/08/07

How to use camera in Android?

This article teaches how to use Android camera.

Step1:Camera preview needs a surface to show.And needs some callback function to handle the take picture processes.
We create a class named CameraPreivew, and implement the SurfaceHolder.Callback and CameraPreviewCallback.
public class CameraPreview implements SurfaceHolder.Callback, Camera.PreviewCallback
{
 public CameraPreview(int PreviewlayoutWidth, int PreviewlayoutHeight)
 {
  // TODO
 } 
 @Override
 public void onPreviewFrame(byte[] arg0, Camera arg1) 
 {
  // At preview mode, the frame data will push to here.
  // But we do not want these data.
 }

 @Override
 public void surfaceChanged(SurfaceHolder arg0, int arg1, int arg2, int arg3) 
 {
  // TODO Auto-generated method stub
 }

 @Override
 public void surfaceCreated(SurfaceHolder arg0) 
 {
  // TODO Auto-generated method stub
 }

 @Override
 public void surfaceDestroyed(SurfaceHolder arg0) 
 {
  // TODO Auto-generated method stub
 }

 // Take picture interface
 public void CameraTakePicture(String FileName)
 {
  // TODO 
 }
 
 // Set auto-focus interface
 public void CameraStartAutoFocus()
 {
  // TODO 
 }
}
Step2: At the class constructor, we set the preview size.
 
public CameraPreview(int PreviewlayoutWidth, int PreviewlayoutHeight)
{
 PreviewSizeWidth = PreviewlayoutWidth;
 PreviewSizeHeight = PreviewlayoutHeight;
}
Step3:At the SurfaceHolder callback functions, we handle the camera instance.
 
@Override
public void surfaceChanged(SurfaceHolder arg0, int arg1, int arg2, int arg3) 
{
  Parameters parameters;
  mSurfHolder = arg0;
  
  parameters = mCamera.getParameters();
  // Set the camera preview size
  parameters.setPreviewSize(PreviewSizeWidth, PreviewSizeHeight);
  // Set the take picture size, you can set the large size of the camera supported.
  parameters.setPictureSize(PreviewSizeWidth, PreviewSizeHeight);
  
  // Turn on the camera flash. 
  String NowFlashMode = parameters.getFlashMode();
  if ( NowFlashMode != null )
   parameters.setFlashMode(Parameters.FLASH_MODE_ON);
  // Set the auto-focus. 
  String NowFocusMode = parameters.getFocusMode ();
  if ( NowFocusMode != null )
   parameters.setFocusMode("auto");
  
  mCamera.setParameters(parameters);
  
  mCamera.startPreview();
}

@Override
public void surfaceCreated(SurfaceHolder arg0) 
{
 mCamera = Camera.open();
 try
 {
  // If did not set the SurfaceHolder, the preview area will be black.
  mCamera.setPreviewDisplay(arg0);
  mCamera.setPreviewCallback(this);
 } 
 catch (IOException e)
 {
  mCamera.release();
  mCamera = null;
 }
}

@Override
public void surfaceDestroyed(SurfaceHolder arg0) 
{
 mCamera.setPreviewCallback(null);
 mCamera.stopPreview();
 mCamera.release();
 mCamera = null;
}
Step4:In the PreviewCallback, we call the myAutoFocusCallback to handle the take picture processes after the auto-focus.
 
// Take picture interface
public void CameraTakePicture(String FileName)
{
 TakePicture = true;
 NowPictureFileName = FileName;
 mCamera.autoFocus(myAutoFocusCallback);
}
 
// Set auto-focus interface
public void CameraStartAutoFocus()
{
 TakePicture = false;
 mCamera.autoFocus(myAutoFocusCallback);
}

Step5:Create a instance to implement the AutoFocusCallback.
 
AutoFocusCallback myAutoFocusCallback = new AutoFocusCallback()
{
 public void onAutoFocus(boolean arg0, Camera NowCamera) 
 {
  if ( TakePicture )
  {
   NowCamera.stopPreview();//fixed for Samsung S2
   NowCamera.takePicture(shutterCallback, rawPictureCallback, jpegPictureCallback);
   TakePicture = false;
  }
 }
};

Step6:Implement 3 callback instance to handle the takepicture processes.
 
ShutterCallback shutterCallback = new ShutterCallback()
{
 public void onShutter() 
 {
  // Just do nothing.
 }
};
   
PictureCallback rawPictureCallback = new PictureCallback()
{
 public void onPictureTaken(byte[] arg0, Camera arg1) 
 {
  // Just do nothing.
 }
};
   
PictureCallback jpegPictureCallback = new PictureCallback()
{
 public void onPictureTaken(byte[] data, Camera arg1) 
 {
  // Save the picture.
  try {
   Bitmap bitmap = BitmapFactory.decodeByteArray(data, 0,data.length);
   FileOutputStream out = new FileOutputStream(NowPictureFileName);
   bitmap.compress(Bitmap.CompressFormat.JPEG, 90, out);
  } 
  catch (IOException e) 
  {
   e.printStackTrace();
  }
 }
}; 

Step7:The camera basic function we all implemented, now we go back to the main activity to use the CameraPreview.
 
public class MyCamera extends Activity
{
 private CameraPreview camPreview; 
 private FrameLayout mainLayout;
     
 private Handler mHandler = new Handler(Looper.getMainLooper());
 
 @Override
 public void onCreate(Bundle savedInstanceState) 
 {
  super.onCreate(savedInstanceState);
  //Set this SPK Full screen
  getWindow().setFlags(WindowManager.LayoutParams.FLAG_FULLSCREEN,  
  WindowManager.LayoutParams.FLAG_FULLSCREEN);
  //Set this APK no title
  requestWindowFeature(Window.FEATURE_NO_TITLE);  
  setContentView(R.layout.main);
        
  SurfaceView camView = new SurfaceView(this);
  SurfaceHolder camHolder = camView.getHolder();
  camPreview = new CameraPreview(640, 480);
        
  camHolder.addCallback(camPreview);
  camHolder.setType(SurfaceHolder.SURFACE_TYPE_PUSH_BUFFERS);
        
  mainLayout = (FrameLayout) findViewById(R.id.frameLayout1);
  mainLayout.addView(camView, new LayoutParams(640, 480));
 }

 @Override 
 public boolean onTouchEvent(MotionEvent event) 
 { 
  if (event.getAction() == MotionEvent.ACTION_DOWN) 
  { 
   int X = (int)event.getX(); 
   if ( X >= 640 )
    mHandler.postDelayed(TakePicture, 300);
   else
    camPreview.CameraStartAutoFocus();
  }
  return true;
 };
    
 private Runnable TakePicture = new Runnable() 
 {
  String extStorageDirectory = Environment.getExternalStorageDirectory().toString();
  String MyDirectory_path = extStorageDirectory;
  String PictureFileName;
  public void run() 
  {
   File file = new File(MyDirectory_path);
   if (!file.exists()) 
    file.mkdirs();
   PictureFileName = MyDirectory_path + "/MyPicture.jpg";
   camPreview.CameraTakePicture(PictureFileName);
 }
 };    
}

Step8:The code is all done here, now is to setup the Android configuration to active the Camera hardware.Edit AndroidManifest.xml to active the function we need.


Step9:And the layout file main.xml should be simple like this.


2012/08/01

How to use Runnable in Android?

This article teaches how to use Runnable class in Android.

There are two ways to use thread class.
One is directly used in the Thread.

new Thread(new Runnable() { @Override public void run() { //Do things. } }).start();

Another way is create a new class extend the Runnable interface, and implement the run() function.

public class MyClass extends Activity 
{
    public void onCreate(Bundle savedInstanceState) 
    {
        super.onCreate(savedInstanceState);
        
        Handler mHandler = new Handler(Looper.getMainLooper());

        // Do it after 300 ms.
        mHandler.postDelayed(DoThings, 300);

        // Or do it right away.
        //mHandler.post(DoThings);
    }    

    private Runnable DoThings = new Runnable() 
    {
        public void run() 
        {
            // Do things.
        }        
    };
}

2012/07/31

How to use thread in Android?

This article teaches how to use thread class in Android.

There are two ways to use thread class.
One is directly used in the function.
The Runnable class is the job to do.

new Thread(new Runnable() { @Override public void run() { //Do things. } }).start();

Another is create a new class and extend the thread interface.

public class MyThread extends Thread { public void run() { //Do things. } }

2012/07/27

How to create Android JNI

This article teaches how to create Android JNI applicatoin.

Step1:Open Android workspace in Eclipse.The workspace we create for the JNI development.Refer to this article How to install Android NDK on windows.

Step2:Create a new Android Project.Eclipse toolbar->New->Android Project.Create a new project directory in the Cygwin directory.


Clicking finish button. A new project in the workspace.


Step3:Manually create 2 directories in the project directory, JNI and libs.
Step4:Creating Andoird.mk file in the JNI directory.Android.mk is just a text file.
Android.mk file contents:
LOCAL_PATH := $(call my-dir)
include $(CLEAR_VARS)
LOCAL_MODULE    := first-jni
LOCAL_SRC_FILES := first-jni.cpp
include $(BUILD_SHARED_LIBRARY)
Step5:Creating  your jni C/C++ file in the JNI directory.Aftercompile the jni code successfully . There is a dynamatic link library(libfirst-jni.so) will be created in the libs directory we create manually before.
The jni code has two different type, C and C++.The difference is C++ file must export it's JNI function to C.
The code explains it self.

/*
*  first-jni.c
*/
#include <string.h> 
#include <jni.h> 
 
jstring
Java_my_project_MyFirstJNI_MyFirstJNI_stringFromJNI( JNIEnv* env,
                                                  jobject thiz )
{
    return (*env)->NewStringUTF(env, "My first JNI!");
}
<

/*
*  first-jni.cpp
*/
#include <string.h> 
#include <jni.h> 
 
extern "C"
jstring
Java_my_project_MyFirstJNI_MyFirstJNI_stringFromJNI( JNIEnv* env,
                                                  jobject thiz )
{
    return env->NewStringUTF("My first JNI!");
}
Step6:The JNI function name has rules.Refer to this link Naming_Functions.

Java_{Package name Replace dot with underline}_{Class name}_{function name}() ,
In my example will be the "Java_my_project_MyFirstJNI_MyFirstJNI_stringFromJNI",
"my_project_MyFirstJNI" is the package name, "package  my.project.MyFirstJNI;"
"MyFirstJNI" is my jni file class name.
"stringFromJNI" is the jni function name for JAVA to call.

Step7:Now we had create our own jni function.Press F5 to refresh the Eclipse.


Step8:Setup the Auto-build configuration, Please flow the steps in this article How to install Android NDK on windows. Starting from Step11.

Step9:Modify the JAVA code to call our JNI function.
package my.project.MyFirstJNI;
 
import android.app.Activity;
import android.os.Bundle;
import android.widget.TextView;
 
public class MyFirstJNI extends Activity 
{
    // Called when the activity is first created.
    @Override
    public void onCreate(Bundle savedInstanceState) 
    {
        super.onCreate(savedInstanceState);
        TextView  tv = new TextView(this);
        tv.setText( stringFromJNI() );
        setContentView(R.layout.main);
    }
    // A native method that is implemented by the
    // 'first-jni' native library, which is packaged
    // with this application.
    //
 
    public native String  stringFromJNI();
     
    // this is used to load the 'first-jni' library on application
    // startup. The library has already been unpacked into
    // /data/data/my.project.MyFirstJNI/libs/libfirst-jni.so at
    // installation time by the package manager.
    //
    static
    {
        System.loadLibrary("first-jni");
    }
}
Final Step:Run the project in emulator, the screen will show the string "My first JNI!".

2012/07/25

How to use OpenGL in Android

This article  teaches how to use OpenGL in Android phone.
There are two classes must be create and implement GLSurfaceView and Renderer.
The article OpenGL explains classes do. I just focus the implement step.

Step1:Create a new project in the Eclipse. I supposed that you already known how.
Step2:.Modify the layout file "main.xml".
<?xml version="1.0" encoding="utf-8"?>
<FrameLayout xmlns:android="http://schemas.android.com/apk/res/android"
    android:orientation="vertical"
    android:layout_width="fill_parent"
    android:layout_height="fill_parent"
    android:id="@+id/frameLayout1">
</FrameLayout>

Step3:Create a new class i named OpenGLRenderer.The class must implement the Renderer class.
package my.project.MyFirstOpenGL;

import javax.microedition.khronos.egl.EGLConfig;
import javax.microedition.khronos.opengles.GL10;

import android.content.Context;
import android.opengl.GLSurfaceView.Renderer;
import android.widget.FrameLayout;

public class OpenGLRenderer implements Renderer
{
 public OpenGLRenderer(Context context, FrameLayout mainLayout)
 {  
 }
 
 @Override
 public void onDrawFrame(GL10 arg0) 
 {
  // TODO Auto-generated method stub
  
 }

 @Override
 public void onSurfaceChanged(GL10 arg0, int arg1, int arg2) 
 {
  // TODO Auto-generated method stub
  
 }

 @Override
 public void onSurfaceCreated(GL10 arg0, EGLConfig arg1) 
 {
  // TODO Auto-generated method stub
  
 }

} 
Step4:In the OpenGLRenderer constructor, we need the Context and FrameLayout parameters. And create the GLSurfaceView add to the frameLayout.
 
public OpenGLRenderer(Context context, FrameLayout mainLayout)
{  
 this.context = context;
 //
 // Create GLSurfaceView and set this class as the renderer.
 //
 GLSurfaceView glView = new GLSurfaceView(context);
 glView.setRenderer(this);  
   
 //put to Main layout
 mainLayout.addView(glView, new LayoutParams(LayoutParams.FILL_PARENT,   LayoutParams.FILL_PARENT));
 }
 
Step5:Put some basic OpenGL code to the other functions.
 
 public void onDrawFrame(GL10 gl) 
 {
  // Clear the whole screen and depth.
  gl.glClear(GL10.GL_COLOR_BUFFER_BIT | GL10.GL_DEPTH_BUFFER_BIT);
  
  // Setting the GL_MODELVIEW matrix
  gl.glMatrixMode(GL10.GL_MODELVIEW); 
  // Load the Identity matrix
  gl.glLoadIdentity();
 }
 
 public void onSurfaceChanged(GL10 gl, int width, int height) 
 {
  // Set OpenGL viewport
  gl.glViewport(0, 0, width, height);
  
  // Setting the GL_PROJECTION matrix
  gl.glMatrixMode(GL10.GL_PROJECTION);
  // Load the Identity matrix
  gl.glLoadIdentity();
  
  float ratio = (float) width / height;
  // Set the fovy to 45 degree. near depth is 0.1f and far depth is 100.f.
  // And maintain the screen ratio.
  GLU.gluPerspective(gl, 45, ratio, 0.1f, 100.f);
 }
 
 public void onSurfaceCreated(GL10 gl, EGLConfig arg1) 
 {
  // Set the background to black
  gl.glClearColor(0, 0, 0, 0);
 } 
Step6:And now we can add OpenGLRenderer class to the main code.
    
 public void onCreate(Bundle savedInstanceState) 
 {
   super.onCreate(savedInstanceState);
   setContentView(R.layout.main);
   FrameLayout mainLayout = (FrameLayout) findViewById(R.id.frameLayout1);
   //
   // Create OpenGL surface and render
   // 
   OpenGLRenderer gl3DView = new OpenGLRenderer(this, mainLayout);
 } 
Step7:OK, We put the necessarily code to the project.Now we can run this project on emulator.But there is nothing in the screen but the black.


Step8:At this stage, we create a OpenGL environment, but we did not put things in there.
   I want load a picture and map to a plane , then rotate it.
 //
 // Load the  Texture
 //
 private void LoadTexture(GL10 gl, Context cont)
 {
   gl.glTexParameterf(GL10.GL_TEXTURE_2D, 
                         GL10.GL_TEXTURE_MAG_FILTER, 
                         GL10.GL_LINEAR);
   InputStream istream = cont.getResources().openRawResource(R.drawable.guam);
   
   Bitmap bitmap;
   try{
    bitmap = BitmapFactory.decodeStream(istream);
   }
   finally{
    try{
     istream.close();
    }
    catch(IOException e){}
   } 
   gl.glGenTextures(MAX_TEXTURE, textureID, 0);
   gl.glBindTexture(GL10.GL_TEXTURE_2D, textureID[0]);
   GLUtils.texImage2D( GL10.GL_TEXTURE_2D, 0, bitmap, 0 ); 
   gl.glTexParameterf(GL10.GL_TEXTURE_2D, GL10.GL_TEXTURE_MAG_FILTER, GL10.GL_LINEAR);
   
   bitmap.recycle();
   mTextureBuffer = getNativeFloatBuffer(squTex);
   mVerticesBuffer = getNativeFloatBuffer(squVtx);
   mIndexBuffer = getNativeShortBuffer(squInx);
 } 
 //
 // Draw the scene
 //
 private void DrawTheScene(GL10 gl)
 { 
  gl.glEnable( GL10.GL_TEXTURE_2D);
  gl.glEnableClientState(GL10.GL_VERTEX_ARRAY);  
  gl.glEnableClientState(GL10.GL_TEXTURE_COORD_ARRAY);

  gl.glVertexPointer( 3, GL10.GL_FLOAT, 0, mVerticesBuffer);
  gl.glTexCoordPointer( 2, GL10.GL_FLOAT, 0, mTextureBuffer);
  
  gl.glBindTexture(GL10.GL_TEXTURE_2D, textureID[0]); 
  
  gl.glDrawElements( GL10.GL_TRIANGLE_FAN,
       squInx.length, 
                      GL10.GL_UNSIGNED_SHORT, 
                      mIndexBuffer);
  
  gl.glDisable(GL10.GL_TEXTURE_2D);
  gl.glDisableClientState(GL10.GL_TEXTURE_COORD_ARRAY);
  gl.glDisableClientState(GL10.GL_VERTEX_ARRAY);
 } 
 
Step9:We need some variables.
 private float orientation = 0.0f;;
 
 final int MAX_TEXTURE = 20;
 private int[] textureID = new int[MAX_TEXTURE];
 

 //     UV Coordinates             
 //          _________ 
 //  v0(0,0) |         | v3(1,0) 
 //          |         |
 //          |         |
 //  v1(0,1) |_________| v2(1,1)
 //
 //
 //   plane vertices
 //     _________ 
 //  p0 |         | p3 
 //     |         |
 //     |         |
 //  p1 |_________| p2
 //

 float squVtx[] = {   
            -1.0f,  1.0f,  0.0f, //p0 Left-Top corner
            -1.0f, -1.0f,  0.0f, //p1 Left-bottom corner 
             1.0f, -1.0f,  0.0f, //p2 Right-bottom corner 
             1.0f,  1.0f,  0.0f };//p3 Right-top corner 

 // USE GL_TRIANGLE_FAN
 short squInx[] = {  0, 1, 2, 3}; //0-1-2 first triangle
                                  //0-2-3 second triangle 
 float squTex[] ={  0.0f, 0.0f,  //v0 Left-Top corner
                    0.0f, 1.0f,  //v1 Left-bottom corner 
                    1.0f, 1.0f,  //v2 Right-top corner
                    1.0f, 0.0f };//v3 Right-bottom corner 
 
 // Our UV texture buffer.
 private FloatBuffer mTextureBuffer; 
 private FloatBuffer mVerticesBuffer;
 private ShortBuffer mIndexBuffer;
 
Step10:Add LoadTexture() and DrawTheScene() to the code.
 public void onSurfaceCreated(GL10 gl, EGLConfig arg1) 
 {
  // Set the background to black
  gl.glClearColor(0, 0, 0, 0);
  
  //Load the texture
  LoadTexture(gl, context);  
 }
 public void onDrawFrame(GL10 gl) 
 {
  // Clear the whole screen and depth.
  gl.glClear(GL10.GL_COLOR_BUFFER_BIT | GL10.GL_DEPTH_BUFFER_BIT);
  
  // Setting the GL_MODELVIEW matrix
  gl.glMatrixMode(GL10.GL_MODELVIEW); 
  // Load the Identity matrix
  gl.glLoadIdentity();
  
  // Move to Z = -10
  gl.glTranslatef(0, 0, -10f);
  // Rotate y-asix
  gl.glRotatef(orientation, 0, 1.0f, 0);
  
  //every time plus 1 defgee.
  orientation += 1.0f;
  if ( orientation >= 360 )
   orientation = 0.0f;

  // Draw the scene
  DrawTheScene(gl);
 }
 
Step11:Another functions.
 private FloatBuffer getNativeFloatBuffer(float[] buffer)
 {
  ByteBuffer ibb = ByteBuffer.allocateDirect(buffer.length*4);
  ibb.order(ByteOrder.nativeOrder());
  FloatBuffer fbf = ibb.asFloatBuffer();

  fbf.put(buffer);
  fbf.position(0);
  return fbf;
 } 
 
 private ShortBuffer getNativeShortBuffer(short[] buffer)
 {
  ByteBuffer ibb = ByteBuffer.allocateDirect(buffer.length*2);
  ibb.order(ByteOrder.nativeOrder());
  ShortBuffer sbf = ibb.asShortBuffer();

  sbf.put(buffer);
  sbf.position(0);
  return sbf;
 } 
Step12:Finally, we put the picture to the OpenGL texture resources and draw 2 triangles to show the picture. Then rotate it frame by fame.

2012/07/20

建立自己的Android JNI程式


本篇介紹如何重頭開始建立自己的Android JNI程式.

1.開啟Eclipse, 並進入之前建立好的Workspace.
2.在此Workspace建立新專案, Eclipse 功能表->File->New->Android Project.
3.填入專案資訊, 注意最好將專案位置放在Cygwin中, 因為才可以讓 Android NDK自動編譯.


4.按下Finish,回到Eclipse主畫面, 看到Package Explorer中新增MyFirstJNI專案,會自動建立幾個APK專案的目錄.


5.接下來手動新增2個目錄, JNI與libs, JNI目錄是用來放C/C++的JNI source code, libs則是放產生的.so 動態連結函式庫.
6.在JNI中需要建立基本的2個檔案, Android.mk與你的C/C++檔案.
   Android.mk的內容如下
LOCAL_PATH := $(call my-dir)
include $(CLEAR_VARS)
LOCAL_MODULE    := first-jni
LOCAL_SRC_FILES := first-jni.cpp
include $(BUILD_SHARED_LIBRARY)


first-jni.cpp是你的C++原始檔檔名, first-jni則是會被compile成函式庫的名稱,最後的檔案名稱就會是libfirst-jni.so

7.C與C++檔案需要再詳細解說一下, 如果是用C檔案,副檔名使用.c,使用C++檔案則是用.cpp,
有什麼差別呢? 有很大差別,會跟你的 code有關係, 因為JAVA 呼應JNI時是使用C的函式來呼叫使用, 所以如果是用C++檔案時, JNI的函式介面需要轉換成C函式才行.以下是範例.

/*
*  first-jni.c
*/
#include <string.h>
#include <jni.h>

jstring
Java_my_project_MyFirstJNI_MyFirstJNI_stringFromJNI( JNIEnv* env,
                                                  jobject thiz )
{
    return (*env)->NewStringUTF(env, "My first JNI!");
}
/*
*  first-jni.cpp
*/
#include <string.h>
#include <jni.h>

extern "C"
jstring
Java_my_project_MyFirstJNI_MyFirstJNI_stringFromJNI( JNIEnv* env,
                                                  jobject thiz )
{
    return env->NewStringUTF("My first JNI!");
}

C++的函式需要使用extern "C"的方式來export.參數env的使用方法也不一樣.

8.JNI export的函式命名也是有規則的,此連結有說明, 規則如下
Java_{Package名稱,點換成底線}_{Class name}_{function name}()
以我們要建立的範例來看"Java_my_project_MyFirstJNI_MyFirstJNI_stringFromJNI"
"my_project_MyFirstJNI"就會是我們的package名稱, "package  my.project.MyFirstJNI;"
"MyFirstJNI"就會是我們建立的class名稱.
"stringFromJNI"就是我們在JAVA code中要呼叫的函式名稱了.

9.在Eclipse的Package Explorer中按下F5 refresh, 會出現我們建立的2個目錄(JNI,libs)與2個檔案.


10.接下來設定自動編譯, 在專案名稱上按右鍵,
     進入Properties.選擇Builders.
     在Builders右邊畫面選擇New.
     在跳出視窗中選擇Program,按下OK.
     接下來設定Builder, 可以參考此篇文章.

     Name: MyFirstJNI_Builder
     Locations:I:\cygwin\bin\bash.exe
     Working Directory:I:\cygwin\bin
     Arguments: --login -c "cd /JNI/MyFirstJNI && ndk-build"
     這裡的 /JNI/MyFirstJNI 目錄位置.不同專案需要設定不同的路徑.是相對於在Cygwin中login的home目錄位置.


11.同樣在此視窗中切換到Refresh頁面.勾選Refresh resources upon completion.選擇Specific resources.
12.在跳出的視窗(Edit Working Set)中, 選擇MyFirstJNI下的libs目錄.按下Finish離開.


13.切換到Build Options, 勾選下列設定:
     Allocate Console
     Launch in background
     After a "Clean"
     During manual builds
     During auto builds
     Specify working set if relevant resources.
14.點選Specify Resources, 選擇 MyFirstJNI下的JNI目錄, 當此目錄中檔案有變動時, 即啟動編譯.
15.設定完成後, 回到Eclipse, 打開我們的JNI檔案,first-jni.cpp, 隨便編輯一下後存檔.即可開始自動編譯, 完成後會出現函式庫檔案.


16.目前為止以成功產生我們的函式庫了, 但JAVA端還沒有來呼叫使用.
17.編輯 MyFirstJNI.java, 如以下程式.
package my.project.MyFirstJNI;

import android.app.Activity;
import android.os.Bundle;
import android.widget.TextView;

public class MyFirstJNI extends Activity 
{
    // Called when the activity is first created.
    @Override
    public void onCreate(Bundle savedInstanceState) 
    {
        super.onCreate(savedInstanceState);
        TextView  tv = new TextView(this);
        tv.setText( stringFromJNI() );
        setContentView(R.layout.main);
    }
    // A native method that is implemented by the
    // 'first-jni' native library, which is packaged
    // with this application.
    //

    public native String  stringFromJNI();
    
    // this is used to load the 'first-jni' library on application
    // startup. The library has already been unpacked into
    // /data/data/my.project.MyFirstJNI/libs/libfirst-jni.so at
    // installation time by the package manager.
    //
    static 
    {
        System.loadLibrary("first-jni");
    }
}
18.編輯完成後,在Emulator中執行程式,會出現"My first JNI!"字串.

2012/07/18

Android 使用 JNI, 安裝NDK.

本篇文章主要解說如何在Eclipse中使用JNI程式, 並可自動compile成native函式庫(.so).

1.首先基本需要有Android SDK.
2.說明一下SDK與NDK差別, Android SDK 可以產生使用JAVA寫的應用程式, 而Android    NDK(Native development kit)主要是可以利用C/C++來執行程式. 使用方式為透過JAVA建立JNI來呼叫C/C++所建立的動態函式庫來執行.
3.要建立Native程式在windows作業系統中需要有Cygwin, 搭配Windows版的NDK.

4.安裝Cygwin, 可以參考此文章安裝.
5.安裝NDK, NDK官方網站上有連結可下載.
   android-ndk-r8-windows.zip
6.NDK下載完後,直接解縮在Cygwin目錄下即可.

7.使用文字編輯器開啟, 在Cygwin安裝目錄中的I:\cygwin\home\{使用主名稱}\.bash_profile
   在最後一行加上以下四行, 編輯完後存檔.

PATH=/android-ndk-r8:${PATH}
NDK_ROOT=/android-ndk-r8
NDK_Sample=/android-ndk-r8/samples
export PATH NDK_ROOT NDK_Sample

8.執行I:\cygwin\Cygwin.bat, 進入Cygwin shell, 切換目錄到/android-ndk-r8/samples/hello-jni/
   執行命令 ndk-build, 會開始進行編譯hello-jni, 會產生動態函式庫libhello-jni.so,成功畫面如下.


9.以上已將必要軟體安裝完成, 可以開始進行第一個JNI程式.
10.NDK安裝目錄中已有hello-jni專案, 我們可開啟此專案.
     Eclipse功能表->File->New->Android Project. 選擇Create project from existing source,
     點Browse選擇NDK安裝目錄中的hello-jni目錄
     I:\cygwin\android-ndk-r8\samples\hello-jni, 會自動帶出此專案資料.按下Finish繼續.


11.在Eclipse的Package中應該會出現Hello-jni專案了, 並可看到lib中已有我們之前compile產生的libhello-jni.so檔案.


12.接著開始設定自動編譯C程式的部份,在專案名稱按下右鍵,進入設定.
     Properties->Builders, 選擇New,跳出選擇視窗,選擇Program, 按下OK.


13.出現設定視窗, 依欄位填入資訊:
     Name: JNI_Builder
     Locations:I:\cygwin\bin\bash.exe
     Working Directory:I:\cygwin\bin
     Arguments: --login -c "cd $NDK_Sample/hello-jni && ndk-build"
    這裡的$NDK_Sample就是在之前編輯.bash_profile時,填入的目錄位置.所以不同專案需要設定    不同的路徑.


14.設定還沒結束, 必須要設定讓Eclipse知道什麼時候要啟動編譯.同樣在此視窗中切換到Refresh頁面.勾選Refresh resources upon completion.選擇Specific resources.


15.在跳出的視窗(Edit Working Set)中, 選擇HelloJni下的libs目錄.按下Finish離開.


16.切換到Build Options, 勾選下列設定:
     Allocate Console
     Launch in background
     After a "Clean"
     During manual builds
     During auto builds
     Specify working set if relevant resources.


17.點選Specify Resources, 選擇HelloJni下的jni目錄, 當此目錄中檔案有變動時, 即啟動編譯.


18.選Finish結束設定, 按下OK, 這時Builder設定視窗中會出現JNI_Builder.


19.按下OK, 離開設定視窗, 回到Eclipse主畫面後, 會開始自動編譯.


20.此時可以開啟hello-jni.c, 編輯內容然後存檔, Eclipse即會開始自動編譯.

安裝Cygwin

如果要建立Android JNI程式需要有Cygwin. 本篇文章介紹如何安裝Cygwin.

1.可參考Cygwin官方網站, http://cygwin.com/install.html
2.下載安裝程式, setup.exe, 我安裝的版本為2.774.


3.下一步, 因為第一次安裝, 選擇Install from Internet.


4.下一步, 選擇安裝目錄.


5.下一步, 選擇網路下載時的暫存目錄, 未來可以選擇Local  Directory安裝.


6.下一步, 選擇網路連接方式, 要透過proxy就填入相關資料.


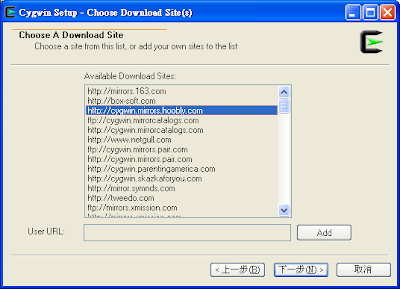
7.下一步, 選擇下載的網址, 就用預設即可.


8.下一步, 選擇要安裝的套件, 因為要compile C與C++, 需要選擇Devel->gcc, gcc-core, gcc-g++,make.


9.下一步, 會自動找出需要的套件, 照它選擇即可.


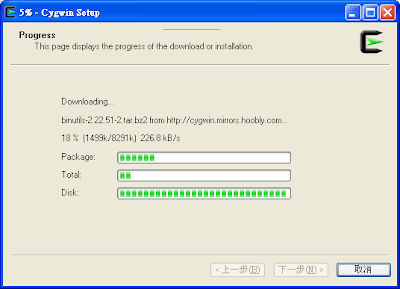
10.下一步, 開始下載.


11.不到10分鐘下載結束, 接下來會自動安裝.


12.安裝結束.


13.在安裝目錄會新增Cygwin環境檔案與目錄.


14.測試一下是否安裝成功, 點擊2下Cygwin.bat進入Cygwin command line.


15.執行make -v 與 gcc -v 檢查版本.


16.出現版本訊息, 代表已安裝成功.